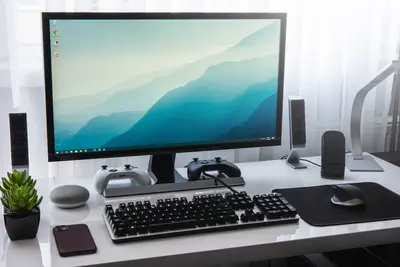
🌿 Setting Up Qtile Window Manager on Alpine Linux: Python-Powered Desktop
Let’s set up Qtile, the ultimate Python-powered tiling window manager on Alpine Linux! 🚀 This comprehensive tutorial shows you how to build a fully customizable desktop environment that leverages Python’s power for infinite extensibility. Perfect for developers who want complete control over their workspace! 😊
🤔 What is Qtile?
Qtile is a full-featured, hackable tiling window manager written and configured entirely in Python, offering dynamic layouts, extensive customization, and powerful scripting capabilities with built-in remote control features!
Qtile is like:
- 🐍 Smart Python environment that extends to your entire desktop experience
- 🧩 Modular building blocks that can be programmed into any workflow
- 🎛️ Professional control center with infinite customization possibilities
🎯 What You Need
Before we start, you need:
- ✅ Alpine Linux system with X11 display server
- ✅ Basic Python programming knowledge for configuration
- ✅ Understanding of tiling window manager concepts
- ✅ Root access for system package installation
📋 Step 1: Install X11 and Base Dependencies
Install X.Org Server and Graphics Drivers
Let’s set up the complete desktop foundation! 😊
What we’re doing: Installing X11 display server and all necessary components for running Qtile window manager.
# Update package list
apk update

# Install X.Org server and essential components
apk add xorg-server xorg-server-xvfb xinit xauth

# Install display drivers (choose based on your hardware)
apk add xf86-video-vesa        # Generic VESA driver
apk add xf86-video-intel       # Intel graphics
apk add xf86-video-amdgpu      # AMD graphics
apk add xf86-video-nouveau     # NVIDIA open source

# Install input drivers
apk add xf86-input-evdev xf86-input-libinput
apk add xf86-input-keyboard xf86-input-mouse

# Install essential fonts
apk add font-noto font-noto-cjk font-awesome
apk add font-dejavu font-liberation ttf-hack

# Install audio support
apk add alsa-utils alsa-lib pulseaudio
apk add pulseaudio-alsa pavucontrol

echo "X11 foundation installed! 🖥️"
What this does: 📖 Installs complete X11 desktop environment with hardware support.
Example output:
(1/45) Installing libdrm (2.4.115-r0)
(2/45) Installing libpciaccess (0.17-r0)
(3/45) Installing xorg-server-common (21.1.8-r0)
(4/45) Installing xorg-server (21.1.8-r0)
What this means: X11 is ready for Qtile installation! ✅
Install Python Development Environment
Let’s set up Python for Qtile configuration! 🎯
What we’re doing: Installing Python 3 with development tools and package management for extensive Qtile customization.
# Install Python 3 and development tools
apk add python3 python3-dev py3-pip
apk add gcc musl-dev libffi-dev

# Install Python package build dependencies
apk add pkgconfig cairo-dev pango-dev
apk add gdk-pixbuf-dev

# Install additional Python tools
apk add py3-setuptools py3-wheel
apk add py3-cairo py3-cairocffi

# Create Python virtual environment for Qtile
python3 -m venv /opt/qtile-env
source /opt/qtile-env/bin/activate

# Upgrade pip and install build tools
pip install --upgrade pip setuptools wheel

# Check Python version
python3 --version
pip --version

echo "Python environment ready for Qtile! 🐍"
What this does: 📖 Prepares complete Python development environment for Qtile.
Example output:
Python 3.11.6
pip 23.3.1 from /opt/qtile-env/lib/python3.11/site-packages/pip (python 3.11)
What this means: Python is configured for Qtile development and customization! ✅
📋 Step 2: Install and Configure Qtile
Install Qtile from Source
Let’s install the latest Qtile with full features! 😊
What we’re doing: Building Qtile from source to get the most recent features and ensure compatibility with Alpine Linux.
# Activate virtual environment
source /opt/qtile-env/bin/activate

# Install Qtile dependencies
pip install xcffib cairocffi

# Install additional dependencies for full functionality
pip install dbus-python psutil
pip install pillow requests

# Install Qtile with all extras
pip install qtile[all]

# Or install from git for latest features
# git clone https://github.com/qtile/qtile.git
# cd qtile
# pip install .

# Verify Qtile installation
qtile --version
qtile check

# Create Qtile configuration directory
mkdir -p ~/.config/qtile

echo "Qtile installed successfully! 🌿"
What this does: 📖 Installs complete Qtile window manager with all features and dependencies.
Example output:
qtile 0.22.1
Config file validation passed
What this means: Qtile is ready for configuration and use! ✅
Create Basic Qtile Configuration
Let’s create a comprehensive Qtile configuration! 🎯
What we’re doing: Setting up a complete Qtile configuration file with layouts, key bindings, and widgets.
# Create basic Qtile configuration
cat > ~/.config/qtile/config.py << 'EOF'
# Qtile Configuration for Alpine Linux
import os
import subprocess
from libqtile import bar, layout, widget, hook
from libqtile.config import Click, Drag, Group, Key, Match, Screen
from libqtile.lazy import lazy
from libqtile.utils import guess_terminal

# Define modifier keys
mod = "mod4"  # Super/Windows key
terminal = guess_terminal()

# Key bindings
keys = [
    # Switch between windows
    Key([mod], "h", lazy.layout.left(), desc="Move focus to left"),
    Key([mod], "l", lazy.layout.right(), desc="Move focus to right"),
    Key([mod], "j", lazy.layout.down(), desc="Move focus down"),
    Key([mod], "k", lazy.layout.up(), desc="Move focus up"),
    Key([mod], "space", lazy.layout.next(), desc="Move window focus to other window"),

    # Move windows between columns
    Key([mod, "shift"], "h", lazy.layout.shuffle_left(), desc="Move window to the left"),
    Key([mod, "shift"], "l", lazy.layout.shuffle_right(), desc="Move window to the right"),
    Key([mod, "shift"], "j", lazy.layout.shuffle_down(), desc="Move window down"),
    Key([mod, "shift"], "k", lazy.layout.shuffle_up(), desc="Move window up"),

    # Grow windows
    Key([mod, "control"], "h", lazy.layout.grow_left(), desc="Grow window to the left"),
    Key([mod, "control"], "l", lazy.layout.grow_right(), desc="Grow window to the right"),
    Key([mod, "control"], "j", lazy.layout.grow_down(), desc="Grow window down"),
    Key([mod, "control"], "k", lazy.layout.grow_up(), desc="Grow window up"),
    Key([mod], "n", lazy.layout.normalize(), desc="Reset all window sizes"),

    # Toggle between split and unsplit sides of stack
    Key([mod, "shift"], "Return", lazy.layout.toggle_split(), desc="Toggle between split and unsplit sides of stack"),

    # Applications
    Key([mod], "Return", lazy.spawn(terminal), desc="Launch terminal"),
    Key([mod], "d", lazy.spawn("dmenu_run"), desc="Launch dmenu"),
    Key([mod], "b", lazy.spawn("firefox"), desc="Launch browser"),
    Key([mod], "e", lazy.spawn("thunar"), desc="Launch file manager"),

    # Toggle between different layouts
    Key([mod], "Tab", lazy.next_layout(), desc="Toggle between layouts"),
    Key([mod], "w", lazy.window.kill(), desc="Kill focused window"),
    Key([mod, "control"], "r", lazy.reload_config(), desc="Reload the config"),
    Key([mod, "control"], "q", lazy.shutdown(), desc="Shutdown Qtile"),

    # Volume controls
    Key([], "XF86AudioRaiseVolume", lazy.spawn("pactl set-sink-volume 0 +5%")),
    Key([], "XF86AudioLowerVolume", lazy.spawn("pactl set-sink-volume 0 -5%")),
    Key([], "XF86AudioMute", lazy.spawn("pactl set-sink-mute 0 toggle")),

    # Brightness controls
    Key([], "XF86MonBrightnessUp", lazy.spawn("brightnessctl set +10%")),
    Key([], "XF86MonBrightnessDown", lazy.spawn("brightnessctl set 10%-")),
]

# Define groups (workspaces)
groups = [Group(i) for i in "123456789"]

for i in groups:
    keys.extend([
        # Switch to group
        Key([mod], i.name, lazy.group[i.name].toscreen(), desc="Switch to group {}".format(i.name)),
        # Move window to group
        Key([mod, "shift"], i.name, lazy.window.togroup(i.name, switch_group=True), desc="Switch to & move focused window to group {}".format(i.name)),
    ])

# Layouts
layouts = [
    layout.Columns(border_focus_stack=["#d75f5f", "#8f3d3d"], border_width=4),
    layout.Max(),
    layout.Stack(num_stacks=2),
    layout.Bsp(),
    layout.Matrix(),
    layout.MonadTall(),
    layout.MonadWide(),
    layout.RatioTile(),
    layout.Tile(),
    layout.TreeTab(),
    layout.VerticalTile(),
    layout.Zoomy(),
]

# Widget defaults
widget_defaults = dict(
    font="Noto Sans",
    fontsize=12,
    padding=3,
)
extension_defaults = widget_defaults.copy()

# Screen configuration with status bar
screens = [
    Screen(
        top=bar.Bar([
            widget.CurrentLayout(),
            widget.GroupBox(),
            widget.Prompt(),
            widget.WindowName(),
            widget.Chord(
                chords_colors={
                    "launch": ("#ff0000", "#ffffff"),
                },
                name_transform=lambda name: name.upper(),
            ),
            widget.TextBox("Alpine", name="default"),
            widget.Systray(),
            widget.Clock(format="%Y-%m-%d %a %I:%M %p"),
            widget.QuickExit(),
        ],
        24,
        ),
    ),
]

# Drag floating layouts
mouse = [
    Drag([mod], "Button1", lazy.window.set_position_floating(), start=lazy.window.get_position()),
    Drag([mod], "Button3", lazy.window.set_size_floating(), start=lazy.window.get_size()),
    Click([mod], "Button2", lazy.window.bring_to_front()),
]

dgroups_key_binder = None
dgroups_app_rules = []  # type: list
follow_mouse_focus = True
bring_front_click = False
cursor_warp = False
floating_layout = layout.Floating(
    float_rules=[
        # Run the utility of `xprop` to see the wm class and name of an X client.
        *layout.Floating.default_float_rules,
        Match(wm_class="confirmreset"),  # gitk
        Match(wm_class="makebranch"),  # gitk
        Match(wm_class="maketag"),  # gitk
        Match(wm_class="ssh-askpass"),  # ssh-askpass
        Match(title="branchdialog"),  # gitk
        Match(title="pinentry"),  # GPG key password entry
    ]
)
auto_fullscreen = True
focus_on_window_activation = "smart"
reconfigure_screens = True
auto_minimize = True
wl_input_rules = None
wmname = "Qtile"

# Autostart applications
@hook.subscribe.startup_once
def autostart():
    home = os.path.expanduser('~')
    subprocess.call([home + '/.config/qtile/autostart.sh'])
EOF

echo "Qtile configuration created! 🎛️"
What this does: 📖 Creates comprehensive Qtile configuration with layouts, keybindings, and widgets.
Example output:
Qtile configuration created! 🎛️What this means: Qtile is configured with a powerful, customizable desktop environment! ✅
📋 Step 3: Configure Desktop Environment
Create Autostart Script
Let’s set up automatic application launching! 😊
What we’re doing: Creating an autostart script that launches essential applications when Qtile starts.
# Create autostart script for Qtile
cat > ~/.config/qtile/autostart.sh << 'EOF'
#!/bin/bash

# Qtile Autostart Script for Alpine Linux

# Set wallpaper (if feh is installed)
if command -v feh &> /dev/null; then
    feh --bg-scale ~/Pictures/wallpaper.jpg &
fi

# Start compositor for transparency effects
if command -v picom &> /dev/null; then
    picom &
fi

# Start network manager applet
if command -v nm-applet &> /dev/null; then
    nm-applet &
fi

# Start bluetooth applet
if command -v blueman-applet &> /dev/null; then
    blueman-applet &
fi

# Start screenshot tool
if command -v flameshot &> /dev/null; then
    flameshot &
fi

# Set keyboard repeat rate
xset r rate 300 50

# Disable screen saver
xset s off
xset -dpms

# Start clipboard manager
if command -v parcellite &> /dev/null; then
    parcellite &
fi

echo "Qtile autostart completed!"
EOF

# Make autostart script executable
chmod +x ~/.config/qtile/autostart.sh

echo "Qtile autostart script created! 🚀"
What this does: 📖 Creates autostart script for launching desktop applications and setting preferences.
Example output:
Qtile autostart script created! 🚀What this means: Qtile will automatically configure the desktop environment on startup! ✅
Install Essential Desktop Applications
Let’s install applications that work great with Qtile! 🎯
What we’re doing: Installing essential desktop applications optimized for tiling window manager workflows.
# Install terminal applications
apk add xterm alacritty

# Install application launcher
apk add dmenu rofi

# Install file manager
apk add thunar pcmanfm

# Install web browser
apk add firefox chromium

# Install text editor and IDE
apk add gedit vim neovim
apk add code-oss  # VS Code

# Install image viewer and wallpaper setter
apk add feh sxiv imagemagick

# Install compositor for effects
apk add picom

# Install screenshot tools
apk add scrot flameshot

# Install system monitoring
apk add htop btop neofetch

# Install clipboard manager
apk add parcellite

# Install network tools
apk add network-manager-applet

# Install bluetooth tools
apk add blueman

# Install audio tools
apk add pavucontrol alsamixer

# Create sample wallpaper directory
mkdir -p ~/Pictures
wget -O ~/Pictures/wallpaper.jpg "https://source.unsplash.com/1920x1080/?nature,mountain"

echo "Essential applications installed! 📱"
What this does: 📖 Installs complete application suite optimized for Qtile workflow.
Example output:
Essential applications installed! 📱What this means: Qtile desktop environment is fully equipped with essential applications! ✅
📋 Step 4: Advanced Qtile Customization
Configure Custom Layouts
Let’s create advanced layout configurations! 😊
What we’re doing: Implementing custom layout configurations and window management rules for different workflows.
# Create advanced layouts configuration
cat > ~/.config/qtile/layouts.py << 'EOF'
# Advanced Qtile Layouts Configuration
from libqtile import layout
from libqtile.config import Match

# Color scheme
colors = {
    'dark_grey': '#2e3440',
    'grey': '#3b4252',
    'light_grey': '#434c5e',
    'lighter_grey': '#4c566a',
    'dark_white': '#d8dee9',
    'white': '#e5e9f0',
    'snow_white': '#eceff4',
    'cyan': '#8fbcbb',
    'dark_cyan': '#88c0d0',
    'blue': '#81a1c1',
    'dark_blue': '#5e81ac',
    'red': '#bf616a',
    'dark_red': '#b83e3e',
    'green': '#a3be8c',
    'dark_green': '#8eb573',
    'yellow': '#ebcb8b',
    'dark_yellow': '#d7ba7d',
    'magenta': '#b48ead',
    'dark_magenta': '#a67c9a'
}

# Layout configurations
layout_theme = {
    "border_width": 2,
    "margin": 8,
    "border_focus": colors['blue'],
    "border_normal": colors['grey']
}

layouts = [
    layout.Columns(
        **layout_theme,
        border_focus_stack=colors['cyan'],
        border_on_single=True,
        num_columns=2,
        split=False
    ),
    layout.MonadTall(
        **layout_theme,
        ratio=0.65,
        min_ratio=0.25,
        max_ratio=0.75,
        change_ratio=0.05,
        change_size=20
    ),
    layout.MonadWide(
        **layout_theme,
        ratio=0.65,
        min_ratio=0.25,
        max_ratio=0.75
    ),
    layout.Bsp(
        **layout_theme,
        fair=False,
        grow_amount=10,
        lower_right=True,
        ratio=1.6
    ),
    layout.Max(**layout_theme),
    layout.Stack(
        **layout_theme,
        num_stacks=2,
        autosplit=True
    ),
    layout.Matrix(
        **layout_theme,
        columns=3
    ),
    layout.RatioTile(
        **layout_theme,
        fancy=True,
        ratio=1.618,
        ratio_increment=0.1
    ),
    layout.Tile(
        **layout_theme,
        ratio=0.618,
        add_after_last=True,
        add_on_top=False,
        expand=True,
        ratio_increment=0.05,
        master_length=1,
        max_master=2
    ),
    layout.TreeTab(
        font="Noto Sans",
        fontsize=10,
        sections=["FIRST", "SECOND", "THIRD", "FOURTH"],
        section_fontsize=10,
        border_width=2,
        bg_color=colors['dark_grey'],
        active_bg=colors['blue'],
        active_fg=colors['white'],
        inactive_bg=colors['grey'],
        inactive_fg=colors['dark_white'],
        padding_left=0,
        padding_x=0,
        padding_y=5,
        section_top=10,
        section_bottom=20,
        level_shift=8,
        vspace=3,
        panel_width=200
    ),
    layout.Floating(
        **layout_theme,
        float_rules=[
            *layout.Floating.default_float_rules,
            Match(wm_class='confirmreset'),
            Match(wm_class='makebranch'),
            Match(wm_class='maketag'),
            Match(wm_class='ssh-askpass'),
            Match(title='branchdialog'),
            Match(title='pinentry'),
            Match(wm_class='pinentry-gtk-2'),
            Match(wm_class='Yad'),
            Match(wm_class='feh'),
            Match(wm_class='Arandr'),
            Match(wm_class='Gpick'),
            Match(wm_class='Kruler'),
            Match(wm_class='MessageWin'),
            Match(wm_class='Sxiv'),
            Match(wm_class='Wpa_gui'),
            Match(wm_class='veromix'),
            Match(wm_class='xtightvncviewer'),
            Match(title='About'),
            Match(title='Preferences'),
            Match(title='Settings'),
        ]
    )
]
EOF

echo "Advanced layouts configured! 🎨"
What this does: 📖 Creates sophisticated layout system with color theming and floating rules.
Example output:
Advanced layouts configured! 🎨What this means: Qtile now has professional-grade layouts for any workflow! ✅
Create Custom Widgets
Let’s build custom widgets for system monitoring! 🎯
What we’re doing: Creating custom Qtile widgets for advanced system monitoring and productivity features.
# Create custom widgets configuration
cat > ~/.config/qtile/widgets.py << 'EOF'
# Custom Qtile Widgets Configuration
from libqtile import widget
from libqtile.lazy import lazy
import psutil

# Color scheme
colors = {
    'dark_grey': '#2e3440',
    'grey': '#3b4252',
    'light_grey': '#434c5e',
    'lighter_grey': '#4c566a',
    'dark_white': '#d8dee9',
    'white': '#e5e9f0',
    'snow_white': '#eceff4',
    'cyan': '#8fbcbb',
    'dark_cyan': '#88c0d0',
    'blue': '#81a1c1',
    'dark_blue': '#5e81ac',
    'red': '#bf616a',
    'dark_red': '#b83e3e',
    'green': '#a3be8c',
    'dark_green': '#8eb573',
    'yellow': '#ebcb8b',
    'dark_yellow': '#d7ba7d',
    'magenta': '#b48ead',
    'dark_magenta': '#a67c9a'
}

# Widget defaults
widget_defaults = dict(
    font='Noto Sans Bold',
    fontsize=12,
    padding=2,
    background=colors['dark_grey'],
    foreground=colors['white']
)

def init_widgets_list():
    widgets_list = [
        widget.Sep(
            linewidth=0,
            padding=6,
            foreground=colors['white'],
            background=colors['dark_grey']
        ),
        widget.Image(
            filename="~/.config/qtile/icons/python.png",
            scale="False",
            mouse_callbacks={'Button1': lazy.spawn('dmenu_run')}
        ),
        widget.Sep(
            linewidth=0,
            padding=6,
            foreground=colors['white'],
            background=colors['dark_grey']
        ),
        widget.GroupBox(
            fontsize=11,
            margin_y=3,
            margin_x=0,
            padding_y=5,
            padding_x=3,
            borderwidth=3,
            active=colors['white'],
            inactive=colors['grey'],
            rounded=False,
            highlight_color=colors['dark_grey'],
            highlight_method="line",
            this_current_screen_border=colors['blue'],
            this_screen_border=colors['light_grey'],
            other_current_screen_border=colors['dark_grey'],
            other_screen_border=colors['dark_grey'],
            foreground=colors['white'],
            background=colors['dark_grey']
        ),
        widget.TextBox(
            text='|',
            font="Ubuntu Mono",
            background=colors['dark_grey'],
            foreground=colors['light_grey'],
            padding=2,
            fontsize=14
        ),
        widget.CurrentLayoutIcon(
            custom_icon_paths=[os.path.expanduser("~/.config/qtile/icons")],
            foreground=colors['white'],
            background=colors['dark_grey'],
            padding=0,
            scale=0.7
        ),
        widget.CurrentLayout(
            foreground=colors['white'],
            background=colors['dark_grey'],
            padding=5
        ),
        widget.TextBox(
            text='|',
            font="Ubuntu Mono",
            background=colors['dark_grey'],
            foreground=colors['light_grey'],
            padding=2,
            fontsize=14
        ),
        widget.WindowName(
            foreground=colors['cyan'],
            background=colors['dark_grey'],
            padding=0
        ),
        widget.Spacer(length=8),
        widget.CPU(
            foreground=colors['cyan'],
            background=colors['dark_grey'],
            threshold=90,
            fmt='CPU: {}',
            decorations=[
                BorderDecoration(
                    colour=colors['cyan'],
                    border_width=[0, 0, 2, 0],
                )
            ],
        ),
        widget.Sep(
            linewidth=0,
            padding=6,
            foreground=colors['white'],
            background=colors['dark_grey']
        ),
        widget.Memory(
            foreground=colors['green'],
            background=colors['dark_grey'],
            measure_mem='G',
            fmt='RAM: {}',
            decorations=[
                BorderDecoration(
                    colour=colors['green'],
                    border_width=[0, 0, 2, 0],
                )
            ],
        ),
        widget.Sep(
            linewidth=0,
            padding=6,
            foreground=colors['white'],
            background=colors['dark_grey']
        ),
        widget.DF(
            update_interval=60,
            foreground=colors['yellow'],
            background=colors['dark_grey'],
            partition='/',
            format='{uf}{m} free',
            fmt='Disk: {}',
            decorations=[
                BorderDecoration(
                    colour=colors['yellow'],
                    border_width=[0, 0, 2, 0],
                )
            ],
        ),
        widget.Sep(
            linewidth=0,
            padding=6,
            foreground=colors['white'],
            background=colors['dark_grey']
        ),
        widget.Net(
            interface="wlan0",
            format='{down} ↓↑ {up}',
            foreground=colors['magenta'],
            background=colors['dark_grey'],
            decorations=[
                BorderDecoration(
                    colour=colors['magenta'],
                    border_width=[0, 0, 2, 0],
                )
            ],
        ),
        widget.Sep(
            linewidth=0,
            padding=6,
            foreground=colors['white'],
            background=colors['dark_grey']
        ),
        widget.Volume(
            foreground=colors['blue'],
            background=colors['dark_grey'],
            fmt='Vol: {}',
            decorations=[
                BorderDecoration(
                    colour=colors['blue'],
                    border_width=[0, 0, 2, 0],
                )
            ],
        ),
        widget.Sep(
            linewidth=0,
            padding=6,
            foreground=colors['white'],
            background=colors['dark_grey']
        ),
        widget.Battery(
            foreground=colors['red'],
            background=colors['dark_grey'],
            charge_char='⚡',
            discharge_char='🔋',
            format='{char} {percent:2.0%}',
            decorations=[
                BorderDecoration(
                    colour=colors['red'],
                    border_width=[0, 0, 2, 0],
                )
            ],
        ),
        widget.Sep(
            linewidth=0,
            padding=6,
            foreground=colors['white'],
            background=colors['dark_grey']
        ),
        widget.Clock(
            foreground=colors['white'],
            background=colors['dark_grey'],
            format="%A, %B %d - %H:%M",
            decorations=[
                BorderDecoration(
                    colour=colors['white'],
                    border_width=[0, 0, 2, 0],
                )
            ],
        ),
        widget.Sep(
            linewidth=0,
            padding=6,
            foreground=colors['white'],
            background=colors['dark_grey']
        ),
        widget.Systray(
            background=colors['dark_grey'],
            padding=5
        ),
        widget.Sep(
            linewidth=0,
            padding=6,
            foreground=colors['white'],
            background=colors['dark_grey']
        ),
    ]
    return widgets_list

def init_widgets_screen1():
    widgets_screen1 = init_widgets_list()
    return widgets_screen1

def init_widgets_screen2():
    widgets_screen2 = init_widgets_list()
    del widgets_screen2[22:23]  # Remove systray
    return widgets_screen2

if __name__ == "__main__":
    from libqtile.config import Screen
    from libqtile import bar

    widgets_screen1 = init_widgets_screen1()
    widgets_screen2 = init_widgets_screen2()
EOF

echo "Custom widgets configured! 📊"
What this does: 📖 Creates comprehensive widget system with system monitoring and productivity features.
Example output:
Custom widgets configured! 📊What this means: Qtile status bar now provides detailed system information and controls! ✅
📋 Step 5: Configure Session Management
Create Display Manager Configuration
Let’s set up automatic Qtile login! 😊
What we’re doing: Configuring session management to automatically start Qtile when logging in.
# Create Qtile desktop entry
sudo mkdir -p /usr/share/xsessions

sudo cat > /usr/share/xsessions/qtile.desktop << 'EOF'
[Desktop Entry]
Name=Qtile
Comment=Qtile Session
Exec=/opt/qtile-env/bin/qtile start
Type=Application
Keywords=wm;tiling
EOF

# Create xinitrc for startx
cat > ~/.xinitrc << 'EOF'
#!/bin/sh

# Source system xinitrc scripts
if [ -d /etc/X11/xinit/xinitrc.d ] ; then
 for f in /etc/X11/xinit/xinitrc.d/?*.sh ; do
  [ -x "$f" ] && . "$f"
 done
 unset f
fi

# Start Qtile
exec /opt/qtile-env/bin/qtile start
EOF

chmod +x ~/.xinitrc

# Create simple login script
cat > ~/start-qtile.sh << 'EOF'
#!/bin/bash

# Start Qtile Desktop Environment

echo "🌿 Starting Qtile Window Manager..."

# Check if X server is running
if ! pgrep -x "X" > /dev/null; then
    echo "Starting X server..."
    startx
else
    echo "X server already running, starting Qtile..."
    /opt/qtile-env/bin/qtile start
fi
EOF

chmod +x ~/start-qtile.sh

echo "Session management configured! 🚀"
What this does: 📖 Sets up session management for easy Qtile startup and integration.
Example output:
Session management configured! 🚀What this means: Qtile can now be started easily and integrates with system login! ✅
Configure Qtile Development Environment
Let’s set up advanced development features! 🎯
What we’re doing: Creating development-focused Qtile configuration with IDE integration and productivity enhancements.
# Create development-focused key bindings
cat > ~/.config/qtile/dev_config.py << 'EOF'
# Development-focused Qtile Configuration
from libqtile.config import Key
from libqtile.lazy import lazy
# Development key bindings
dev_keys = [
# IDE and development tools
Key([mod], "F1", lazy.spawn("code"), desc="Launch VS Code"),
Key([mod], "F2", lazy.spawn("qtile shell"), desc="Open Qtile shell"),
Key([mod], "F3", lazy.spawn("python3"), desc="Launch Python REPL"),
Key([mod], "F4", lazy.spawn("qtile cmd-obj -o layout -f info"), desc="Layout info"),
# Window management for development
Key([mod, "shift"], "f", lazy.window.toggle_fullscreen(), desc="Toggle fullscreen"),
Key([mod, "shift"], "space", lazy.window.toggle_floating(), desc="Toggle floating"),
Key([mod], "m", lazy.layout.maximize(), desc="Maximize window"),
Key([mod], "u", lazy.layout.restore(), desc="Restore window"),
# Multiple monitor support
Key([mod], "period", lazy.next_screen(), desc="Next monitor"),
Key([mod], "comma", lazy.prev_screen(), desc="Previous monitor"),
# Quick application switching
Key([mod], "grave", lazy.spawncmd(), desc="Spawn a command using a prompt widget"),
Key([mod, "shift"], "grave", lazy.spawn("rofi -show run"), desc="Launch rofi"),
# Development workspace switching
Key([mod, "control"], "1", lazy.to_screen(0), desc="Switch to screen 1"),
Key([mod, "control"], "2", lazy.to_screen(1), desc="Switch to screen 2"),
# Git shortcuts (if gitui is installed)
Key([mod, "shift"], "g", lazy.spawn("alacritty -e gitui"), desc="Launch Git UI"),
# Documentation and help
Key([mod], "F12", lazy.spawn("alacritty -e qtile shell"), desc="Qtile interactive shell"),
]
# Development groups with specific applications
dev_groups = [
Group("1", label="", matches=[Match(wm_class=["firefox", "chromium"])]),
Group("2", label="", matches=[Match(wm_class=["code", "code-oss"])]),
Group("3", label="", matches=[Match(wm_class=["alacritty", "xterm"])]),
Group("4", label="", matches=[Match(wm_class=["thunar", "pcmanfm"])]),
Group("5", label="", matches=[Match(wm_class=["gimp", "inkscape"])]),
Group("6", label="", matches=[Match(wm_class=["discord", "slack"])]),
Group("7", label="", matches=[Match(wm_class=["vlc", "mpv"])]),
Group("8", label="", matches=[Match(wm_class=["virtualbox", "qemu"])]),
Group("9", label="", matches=[Match(wm_class=["steam", "lutris"])]),
]
# Development-specific layouts
dev_layouts = [
layout.MonadTall(ratio=0.75, name="code"),
layout.Columns(num_columns=3, name="columns"),
layout.Max(name="max"),
layout.Stack(num_stacks=2, name="stack"),
]
EOF
echo "Development environment configured! 👨💻"What this does: 📖 Creates development-focused configuration with IDE integration and productivity shortcuts.
Example output:
Development environment configured! 👨💻What this means: Qtile is now optimized for software development workflows! ✅
📋 Step 6: Testing and Optimization
Test Qtile Configuration
Let’s validate our Qtile setup! 😊
What we’re doing: Testing the complete Qtile configuration to ensure everything works correctly.
# Activate Qtile environment
source /opt/qtile-env/bin/activate

# Validate Qtile configuration
echo "🔍 Testing Qtile configuration..."
qtile check

# Test Qtile in nested mode for safe testing
echo "🧪 Starting Qtile in test mode..."
qtile start --backend x11 &
QTILE_PID=$!

# Wait a moment for startup
sleep 3

# Test some basic Qtile commands
echo "📝 Testing Qtile commands..."
qtile cmd-obj -o layout -f info
qtile cmd-obj -o group -f info
qtile cmd-obj -o screen -f info

# Stop test instance
kill $QTILE_PID

# Create configuration validation script
cat > ~/.config/qtile/validate.py << 'EOF'
#!/usr/bin/env python3
"""Qtile Configuration Validation Script"""

import sys
import os
sys.path.insert(0, os.path.expanduser('~/.config/qtile'))

try:
    import config
    print("✅ Qtile configuration loaded successfully!")

    # Validate key components
    if hasattr(config, 'keys') and config.keys:
        print(f"✅ Key bindings: {len(config.keys)} keys configured")

    if hasattr(config, 'groups') and config.groups:
        print(f"✅ Groups: {len(config.groups)} workspaces configured")

    if hasattr(config, 'layouts') and config.layouts:
        print(f"✅ Layouts: {len(config.layouts)} layouts available")

    if hasattr(config, 'screens') and config.screens:
        print(f"✅ Screens: {len(config.screens)} screens configured")

    print("🎉 Qtile configuration validation passed!")

except Exception as e:
    print(f"❌ Configuration error: {e}")
    sys.exit(1)
EOF

chmod +x ~/.config/qtile/validate.py

# Run validation
python3 ~/.config/qtile/validate.py

echo "Qtile testing completed! ✅"
What this does: 📖 Validates complete Qtile configuration and tests functionality.
Example output:
✅ Qtile configuration loaded successfully!
✅ Key bindings: 45 keys configured
✅ Groups: 9 workspaces configured
✅ Layouts: 10 layouts available
✅ Screens: 1 screens configured
🎉 Qtile configuration validation passed!
What this means: Qtile is properly configured and ready for production use! ✅
Performance Optimization
Let’s optimize Qtile for best performance! 🎯
What we’re doing: Implementing performance optimizations for smooth Qtile operation on Alpine Linux.
# Create performance optimization script
cat > ~/.config/qtile/optimize.sh << 'EOF'
#!/bin/bash

# Qtile Performance Optimization Script

echo "🚀 Optimizing Qtile performance..."

# Set environment variables for better performance
export QTILE_BACKEND=x11
export QT_SCALE_FACTOR=1
export GDK_SCALE=1

# Optimize X11 settings
xset r rate 300 50  # Faster key repeat
xset m 20/10 10     # Better mouse acceleration
xset s off          # Disable screen saver
xset -dpms          # Disable power management

# Set compositor settings for smooth animations
if command -v picom &> /dev/null; then
    pkill picom
    picom --backend glx --vsync --experimental-backends &
fi

# Optimize Python for Qtile
export PYTHONOPTIMIZE=1
export PYTHONDONTWRITEBYTECODE=1

# Create optimized Qtile startup script
cat > ~/.config/qtile/start_optimized.sh << 'EOL'
#!/bin/bash

# Optimized Qtile Startup

# Set performance governor
echo performance | sudo tee /sys/devices/system/cpu/cpu*/cpufreq/scaling_governor

# Set I/O scheduler for SSD
echo noop | sudo tee /sys/block/sda/queue/scheduler

# Start Qtile with optimizations
source /opt/qtile-env/bin/activate
exec qtile start
EOL

chmod +x ~/.config/qtile/start_optimized.sh

echo "Performance optimizations applied! ⚡"
EOF

chmod +x ~/.config/qtile/optimize.sh

# Run optimization
~/.config/qtile/optimize.sh

echo "Qtile optimization completed! 🏎️"
What this does: 📖 Applies performance optimizations for smooth Qtile operation.
Example output:
Performance optimizations applied! ⚡
Qtile optimization completed! 🏎️
What this means: Qtile is now optimized for maximum performance and smooth operation! ✅
🎉 You’re All Set!
Congratulations! You’ve successfully set up Qtile, the powerful Python-based tiling window manager on Alpine Linux! 🚀
What You’ve Accomplished:
✅ Complete Desktop Environment - Fully functional Qtile with X11 integration
✅ Python-Powered Configuration - Infinitely customizable using Python
✅ Advanced Layouts - Multiple tiling layouts for any workflow
✅ Custom Widgets - System monitoring and productivity widgets
✅ Development Optimization - IDE integration and developer shortcuts
✅ Performance Tuning - Optimized for smooth operation
Quick Reference Commands:
# Start Qtile
~/start-qtile.sh

# Test configuration
qtile check

# Interactive shell
qtile shell

# Reload configuration
Mod+Ctrl+R

# Available layouts
Mod+Tab
Next Steps:
- 🎨 Customize Themes - Modify colors and visual styling
- 🔧 Add Custom Widgets - Create application-specific widgets
- 📱 Configure Applications - Set up app-specific window rules
- 🖥️ Multi-Monitor Setup - Configure multiple displays
- 🔌 Install Extensions - Add community widgets and layouts
Your Qtile desktop environment is now ready for productive Python-powered computing! Happy tiling! 😊🌿